What is a Mythical Race?
Think of a "Race" in Mythical Races as a special blueprint for characters on your server. This blueprint defines a set of rules, abilities, potion effects, and attributes that make each race unique. It's how you give players distinct advantages, appearances, or playstyles.
Each race you create needs specific settings filled in. The free version of Mythical Races focuses on attributes (like speed, health) and potion effects. The premium version unlocks many more advanced options and abilities (which are covered in a separate MRPremiumAddons guide).
How Do I Create or Change Races?
All race configurations live in a file called config.yml. You'll find this file inside the plugins/MythicalRaces/ folder on your server.
Inside config.yml, you'll see entries for each race (like "Human", "Elf", etc.). Each entry is the "key" or internal name for the race, followed by its settings.
For example, a race might be internally named Human, but you can make it display in-game as "&cHuman" using color codes. The internal name and display name can be different!
Understanding Race Definitions
When you define a race (e.g., Human:), you're essentially creating a master key. This key unlocks all the specific details and settings for that race, such as its display name, its icon in the GUI, how it levels up, and its special passive effects.
As you go through this guide and watch the video tutorial at the end, you'll get a clearer picture of how all these pieces fit together.
The 'material' Setting: Choosing a Race Icon
The material setting determines what item icon represents the race in the /races gui. This can be any standard Minecraft item, like a BOOK, DIAMOND_SWORD, or FEATHER.
You can find a list of valid material names (use the ones in ALL CAPS) on the Spigot Javadocs for Materials.
Advanced Icons: Custom Heads & Models (Premium Feature)
If you have a premium version or an addon that supports it, you can use more advanced icons:
- Custom Player Heads: Use a texture link from a site like Minecraft-Heads.com.
Example:material: 'https://textures.minecraft.net/texture/your_texture_hash_here;'Make sure to include the semicolon
;at the end of the URL! - Custom Model Data (for Resource Packs): If your server uses a resource pack with custom item models, you can specify the base material and the custom model ID.
Example (displays a BOOK item with custom model ID 4):material: 'BOOK:4'
Example of a Full Race Definition
Here's a detailed look at a sample 'Human' race configuration. Comments explain each setting:
Human:
  # How the race name appears in-game (e.g., in chat, GUI)
  # '&c' is a color code for red.
  displayName: '&cHuman'

  # The item icon shown for this race in the GUI.
  # Find material names at: hub.spigotmc.org/javadocs/spigot/org/bukkit/Material.html
  material: 'BOOK'

  # Is this race an evolution of another? (true/false)
  isSubRace: false

  # If isSubRace is true, which base race does it evolve from? (e.g., 'Elf')
  # Leave empty if it's a base race.
  subRaceType: ''

  # Slot in the /races tree GUI for sub-races (0-53).
  # Must be unique within its own evolution line.
  treeSlot: 4

  # Level required in the base race to unlock this race.
  # Usually 0 for base races.
  levelRequire: 0

  # Which page of the /races GUI this base race appears on.
  guiPage: 1

  # Slot in the main /races GUI for base races (0-53).
  # Must be unique among base races.
  slot: 11

  # How this race gains experience (e.g., RUNNING, HUNTING).
  # Can be a comma-separated list for multiple types.
  lvlType: 'RUNNING'

  # The maximum level this race can achieve.
  maxLevel: 100

  # Base XP gained per action related to its lvlType.
  gainXP: 2

  # XP needed per level. Formula: (player_current_xp / xpPerLevel) * current_level
  xpPerLevel: 24

  # Text shown when viewing race info. Use '&' for color codes.
  lore:
    - '&4----- &cHuman Race &4-----'
    - '&cWell I think you know what a human is'
    - ' '
    - '&5----- Day Time Passive Effects -----'
    - 'None'
    - '&5----- Night Time Passive Effects -----'
    - 'None'

  # --- Passive Effects (Day) ---
  # Potion effects active during the day.
  dayPassivePotionEffects:
    - 'null' # Example: 'SPEED'
  # Base strength of daytime potions (0 = level 1).
  dayPassivePotionEffectsBase:
    - 'null' # Example: 0
  # Conditions for daytime potions (see "Data and Potions" section).
  dayRaceDataPotion:
    - 'null' # Example: 'ALL Y > -1000 -1 ALL ALL ALL ALL'

  # Generic Minecraft attributes modified during the day.
  dayPassiveGenericAttributes:
    - 'GENERIC_MOVEMENT_SPEED'
  # Base value for daytime attributes.
  dayPassiveGenericAttributesBase:
    - 0.1
  # How much the attribute increases per race level.
  dayRacePassiveAttributesLevel:
    - 0.0
  # Conditions for daytime attributes (see "Data and Potions" section).
  dayRaceDataAttribute:
    - 'ALL Y < -1000 -1 ALL ALL ALL ALL' # Using < as per original example

  # --- Passive Effects (Night) ---
  # Potion effects active during the night.
  nightPassivePotionEffects:
    - 'null'
  nightPassivePotionEffectsBase:
    - 'null'
  nightRaceDataPotion:
    - 'null'

  # Generic Minecraft attributes modified during the night.
  nightPassiveGenericAttributes:
    - 'GENERIC_MOVEMENT_SPEED'
  nightPassiveGenericAttributesBase:
    - 0.1
  nightRacePassiveAttributesLevel:
    - 0.0
  nightRaceDataAttribute:
    - 'ALL Y < -1000 -1 ALL ALL ALL ALL' # Using < as per original example

  # Commands run when a player switches TO or FROM this race.
  executeCommandUponSwitching:
    - 'null' # Example: 'say {player} became a Human!'
             # Example for leaving: 'say {player} is no longer Human!===='
Important: In your own config.yml, you'll need to replace values like 'null' or placeholder examples with the actual settings and effects you want for your races.
Sub-Races & Evolution Paths
A "Sub-Race" is an advanced or specialized version of a "Base Race." Think of it as an evolution or a branching path. Players can typically choose a sub-race through the race GUI once they meet certain requirements (like reaching a specific level in the base race).
How to Define a Sub-Race
To make one race a sub-race of another, you need to configure these settings in the sub-race's definition (not the base race's):
- Set
isSubRaceto true: This tells the plugin that this race is an evolution.isSubRace: true - Specify the
subRaceType: This is the internal name of the base race it evolves from. For example, if "SuperHuman" is a sub-race of "Human":subRaceType: 'Human' - Set the
treeSlot: This determines where the sub-race appears in the/races tree [BaseRaceName]GUI.- Slots are numbered 0-53 (top-left to bottom-right).
- Each sub-race within the same evolution line (e.g., all sub-races of "Human") must have a unique
treeSlotto avoid them overlapping in the tree view.
treeSlot: 13 # Example slot number - Define
levelRequire: This is the level the player must achieve in the base race (specified insubRaceType) before they can choose this sub-race.levelRequire: 50 # Example: Requires base race level 50
Slot Placement for Base Races in GUI
For Base Races (those with isSubRace: false), the slot setting determines their position in the main /races gui.
- Like
treeSlot, this is numbered 0-53. - Each base race must have a unique
slotnumber to prevent overlap in the main GUI.
slot: 10 # Example slot for a base raceRemember to replace x or example numbers with actual values that make sense for your server's GUI layout and progression.
The Levelling System
Mythical Races allows players to level up their chosen race by performing various in-game actions. This progression can unlock new abilities, improve stats, or allow access to sub-races.
Understanding Levelling Types (lvlType)
The lvlType setting in a race's configuration determines how a player earns experience for that race. Here are the available types:
- HUNTING: Killing mobs or animals.
- RUNNING: Covering distance by running.
- HARVESTING: Breaking fully grown crops.
- BUILDER: Placing blocks.
- FISHING: Successfully catching fish.
- EXCAVATION: Breaking general blocks (dirt, sand, stone etc.).
- MINER: Mining ores, stone, and deepslate variants.
- WOODCUTTER: Chopping down trees (logs).
- TANKER: Taking damage from enemies or the environment.
- SWIMMING: Covering distance by swimming.
- FLYING: Covering distance by flying (e.g., Elytra).
- DIGGER: Breaking blocks like sand, gravel, dirt with a shovel.
- ARCHER: Killing mobs/animals with arrows from a bow/crossbow.
XP Gain Settings
gainXP: This is the base amount of experience points (XP) awarded each time a player performs an action related to their race'slvlType.maxLevel: The highest level a player can achieve in this race.xpPerLevel: This value is used in a formula to determine how much XP is needed for the next level. The formula is often something like:(Total XP Needed for Next Level) = (Base XP per Level from config) * (Current Level)or a similar scaling calculation.
The original text had: "players xp / xpPerLevel * current level" which might be for calculating current progress rather than total needed, or a different formula. Clarify based on plugin's actual behavior if possible. AssumingxpPerLevelis a base requirement that scales.
Multiple Levelling Types for One Race
A race can gain XP from more than one activity. To do this, list multiple lvlType values, separated by commas:
lvlType: 'RUNNING, HUNTING, MINER'How Movement-Based Levelling Works
For lvlTypes based on movement (like RUNNING, SWIMMING, FLYING), the plugin typically checks how far a player has moved over a set period.
You might see or configure settings like this (syntax may vary based on plugin version):
# Example for RUNNING type movement_xp_settings: # This key might be different RUNNING: distance_required: 10 # Player must move at least 10 blocks time_interval_ticks: 600 # Checked every 600 ticks (30 seconds) xp_awarded: 2 # Corresponds to gainXPThe original example leveling: 'RUNNING' distance: 10 time: 600 might be a simplified representation or an older format. The key idea is that XP is awarded if a certain distance is covered within a certain time (in server ticks, where 20 ticks = 1 second).
Understanding the 'Lore' Section
The lore section in your race configuration is simply the descriptive text that appears when players view information about the race (e.g., in the GUI or via an info command).
- Each line in the lore is a separate string.
- You can use Minecraft color codes (e.g.,
&cfor red,&5for purple) to style the text. - Be careful with special characters. The original note "not to use more than two > ' < on the same line" likely refers to issues with YAML parsing if single quotes aren't handled correctly within strings that also contain them. Best practice is to enclose strings with special characters in single quotes
'like this &cText!'or double quotes if they contain single quotes.
Now that you understand the basics of races and levelling, let's dive into how passive effects like potions and attributes are configured!
Passive Effects: Potions & Attributes
Mythical Races allows races to have passive effects – permanent or conditional potion effects and attribute modifications that are active simply by being that race. These are configured separately for daytime and nighttime.
Setting Up Passive Potion Effects
Three main settings work together for passive potion effects (using daytime as an example, nighttime versions are similar, e.g., nightPassivePotionEffects):
dayPassivePotionEffects: A list of potion effect types that can be active during the day.
Example:['SPEED', 'JUMP']
Find valid Potion Effect Type names here. Use the names in ALL CAPS.dayPassivePotionEffectsBase: A list of base strengths (amplifiers) for the corresponding potion effects.
Example:[0, 1](Speed I, Jump II, as potion amplifiers start at 0 for level 1).
The first amplifier in this list applies to the first potion indayPassivePotionEffects, the second to the second, and so on.dayRaceDataPotion: A list of "Data" strings. Each string defines the specific conditions (location, environment, etc.) under which the corresponding potion effect will be active.
Understanding the "Data" String for Conditions
The 'Data' string is the key to controlling when and where passive effects (and day/night race commands) apply. It's a sequence of arguments separated by spaces. Some arguments can themselves be comma-separated lists (e.g., multiple biomes or blocks).
The standard format is: 'BIOMES Y_AXIS COMPARISON NUMBER AMPLIFIER_OUTSIDE_CONDITION POSITION_CHECK BLOCKS_FOR_POSITION WEATHER_CHECK WORLD_CHECK'
Let's break down the default example: 'ALL Y > -1000 -1 ALL ALL ALL ALL'
- BIOMES: Biome(s) where the effect applies.
ALLmeans any biome.
Examples:PLAINS,FOREST,DESERT. List: Biomes. - Y: Indicates a check on the player's Y-coordinate (height).
- Comparison: How the player's Y is compared:
>(greater),<(less),=(equal),>=,<=. - Number: The Y-value for comparison (e.g.,
-1000inY > -1000). - Amplifier (Outside Condition): For potions, this is the amplifier applied if the *other* conditions in this Data string are not met.
-1typically means "remove this specific potion effect." For attributes, it might be a different default value. - Position: Player's position relative to specified 'Blocks'. Options:
ALL(any),ABOVE,MID(inside),BELOW,AROUND. - Blocks: Block material(s) for the 'Position' check.
ALLmeans any block.
Examples:WATER,STONE,GRASS_BLOCK. List: Materials. - Storm: Weather condition.
ALL(any),TRUE(must be storming),FALSE(must not be storming). - World: World(s) where effect applies.
ALLmeans any world.
Examples:world_nether,resource_world,event_map.
Special Data Types & Examples (Advanced Conditions)
The Data string can also use special keywords for more complex checks (some may be premium-only features):
VAMPIRE: Effect applies if the player has direct sky access (no solid blocks above).
Example:'ALL Y > -1000 -1 VAMPIRE VAMPIRE ALL ALL'
(VAMPIREoften replaces 'Position' and 'Blocks' arguments).CUSTOM[num] [BLOCK_LIST]: Effect applies if specified blocks are found within a[num]block radius of the player.
Example:'ALL Y > -1000 -1 CUSTOM5 STONE,COAL_ORE ALL ALL'LIGHTA[num]: Effect applies if current light level is above[num](0-15).
Example:'ALL Y > -1000 -1 LIGHTA7 LIGHT ALL ALL'(Light level > 7)LIGHTB[num]: Effect applies if current light level is below[num].
Example:'ALL Y > -1000 -1 LIGHTB4 LIGHT ALL ALL'(Light level < 4)TEMPA[num]: Effect applies if biome temperature is above[num].
Example:'ALL Y > -1000 -1 TEMPA0.9 TEMP ALL ALL'(Warm biomes)TEMPB[num]: Effect applies if biome temperature is below[num].
Example:'ALL Y > -1000 -1 TEMPB0.1 TEMP ALL ALL'(Cold biomes)
PlaceholderAPI Integration in Data Strings (Premium)
For even more dynamic conditions, you can use PlaceholderAPI placeholders (often a premium feature):
%placeholder%==value: Checks for equality.
Example:'ALL Y > -1000 -1 %mythicalraces_race%==Elf PAPI ALL ALL'%placeholder%!=value: Checks for inequality.
Example:'ALL Y > -1000 -1 %player_world%!=world_event PAPI ALL ALL'%placeholder%>number: Checks if placeholder (as a number) is greater than.
Example:'ALL Y > -1000 -1 %mythicalraces_get_level%>20 PAPI ALL ALL'%placeholder% <number: Checks if placeholder (as a number) is less than.
Example:'ALL Y > -1000 -1 %vault_eco_balance% <100 PAPI ALL ALL'
Note: Placeholder string comparisons usually work best for single words or numbers.
Passive Attributes
Similar to potions, races can have modified generic Minecraft attributes (like movement speed, max health, attack damage). The configuration structure is parallel to potions:
dayPassiveGenericAttributes: List of attributes to modify (e.g.,GENERIC_MOVEMENT_SPEED,GENERIC_MAX_HEALTH). Find attribute names here.dayPassiveGenericAttributesBase: List of base values to add to (or set for) those attributes. (e.g.,0.05for speed,4.0for +2 hearts of health).dayRacePassiveAttributesLevel: List of values that get added to the base per race level achieved. (e.g.,0.001added to speed per level).dayRaceDataAttribute: List of "Data" strings (same format as for potions) defining conditions for each attribute modification.
Remember, the order in these lists matters! The first entry in dayPassiveGenericAttributes corresponds to the first in ...Base, ...Level, and dayRaceDataAttribute.
Commands on Race Change (executeCommandUponSwitching)
You can make the server automatically run commands when a player switches to a particular race, or (in premium versions) when they switch away from it.
This is configured using the executeCommandUponSwitching list in the race's settings.
Basic Usage (Command on Joining Race)
List the console commands you want to run. Use {player} as a placeholder for the player's name.
executeCommandUponSwitching:
  - 'say Welcome, {player}, to the Human race!'
  - 'effect give {player} regeneration 5 1'
Commands on Leaving a Race (Premium Feature)
In premium versions, you can specify commands that run when a player switches away from this race to another one. To do this, add ==== (four equal signs) to the end of the command line.
executeCommandUponSwitching:
  - 'say Welcome, {player}, to the Human race!' # Runs when player becomes Human
  - 'say Farewell, {player}, you are no longer Human!====' # Runs when player stops being Human
  - 'effect clear {player} regeneration====' # Also runs on leaving
This allows for cleanup actions or specific messages when a player changes their racial identity.
Helpful Tips & Important Notes
Aligning Race Configurations (for Readability)
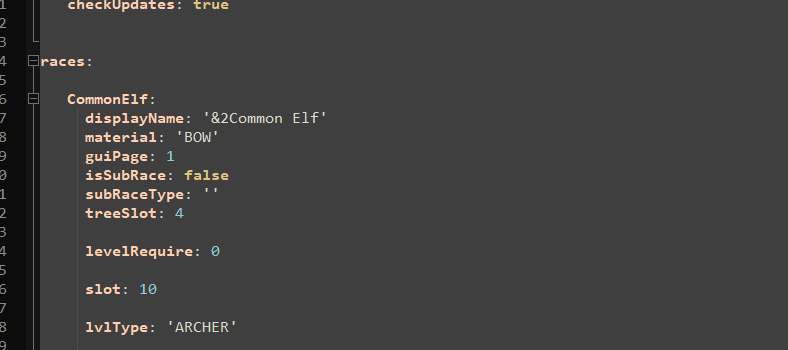
When editing your config.yml with many races, good alignment can make it much easier to read and spot errors. If you use an editor like Notepad++, you might notice it can show vertical alignment guides.
The original tip mentioned aligning based on the "line between the 'C' and 'o' in 'CommonElf'". This refers to YAML indentation. Ensure that all settings for a single race (like displayName, material, etc.) are indented consistently under the race name (e.g., Human:). Incorrect indentation is a common cause of YAML parsing errors.
Consistent indentation is key for YAML files.
Timer for Checking Passive Effects (timerCheckingPotionEffects)
The plugin periodically checks if passive potion effects (and likely attributes/commands tied to Data strings) should be applied or removed based on their conditions. This frequency is controlled by the timerCheckingPotionEffects setting, usually found in the main config.yml of MythicalRaces.
- The value is in server ticks (20 ticks = 1 second).
- A lower value means more frequent checks (more responsive, but slightly more server load).
- A higher value means less frequent checks (less server load, but effects might take longer to update).
Example: To check every 5 seconds (100 ticks):
timerCheckingPotionEffects: 100How Lists of Effects/Attributes Correspond
When you define lists for passive effects (like dayPassivePotionEffects, dayPassivePotionEffectsBase, and dayRaceDataPotion), the items in these lists correspond by their order (index).
For example:
- The first potion in
dayPassivePotionEffectsuses... - ...the first amplifier in
dayPassivePotionEffectsBase, and... - ...the first Data string in
dayRaceDataPotionfor its conditions.
This applies to all sets of passive effect/attribute lists (day/night, potions/attributes).

Keep your lists aligned for clarity!
Video Tutorial: Race Creation Examples
Watching someone go through the process can be very helpful! This video demonstrates how to create and configure races (it may refer to features available in different plugin versions, but the core concepts are often similar).
Tip: Even if a video is slightly older, the fundamental principles of YAML configuration and how Mythical Races structures its race data often remain consistent.
Commands & Permissions Guide
This section details the commands and permissions available in MythicalRaces, separated for Free and Premium versions.
Free Version: Permissions
mythicalraces.race.[raceName]: Choose a specific race. Ex:mythicalraces.race.Elfmythicalraces.help: Access/races help.mythicalraces.info.races: View race info.mythicalraces.gui: Open the race selection GUI.mythicalraces.tree: View the race evolution tree.mythicalraces.profile: View your own race profile.mythicalraces.profile.other: View other players' profiles.mythicalraces.biome: Check your current biome.mythicalraces.list.races: List available races.mythicalraces.lvlset: Set another player's race level (Admin).mythicalraces.cooldown.bypass: Bypass race choosing cooldowns.
Free Version: Placeholders (for PlaceholderAPI)
%mythicalraces_race%: Player's race internal name.%mythicalraces_display_race_name%: Player's race display name.%mythicalraces_cooldown_time%: Remaining cooldown time.%mythicalraces_has_cooldown%: "true" or "false" for cooldown status.%mythicalraces_get_xp%: Current race XP.%mythicalraces_get_level%: Current race level.%mythicalraces_get_max_xp%: XP needed for next level.%mythicalraces_get_xp/max_xp%: XP progress (e.g., "500/1000").
Free Version: Commands
- /races choose [raceName]
- /races help
- /races info [raceName]
- /races gui
- /races tree [baseRaceName]
- /races profile
- /races profile [playerName]
- /races set [playerName] [raceName]
- /races biome
- /races list
- /races lvlset [playerName] [level]
Premium Version: Additional Permissions
mythicalraces.class.[className]: Choose a specific class.mythicalraces.gui.class: Open class selection GUI.mythicalraces.tree.class: View class evolution tree.mythicalraces.lvlsetclass: Set player's class level (Admin).mythicalraces.leaderboard: Access leaderboards.mythicalraces.addxp: Add race XP to a player (Admin).mythicalraces.addxpclass: Add class XP to a player (Admin).mythicalraces.rcooldown: Manage player's race cooldown (Admin).mythicalraces.sub.display: Display info for a specific sub-race/class.mythicalraces.toggle.player: Toggle another player's race abilities/passives (Admin).mythicalraces.toggle: Toggle your own race abilities/passives.
Premium Version: Additional Placeholders
%mythicalraces_class%: Player's class internal name.%mythicalraces_display_class_name%: Player's class display name.%mythicalraces_cooldown_time_class%: Class cooldown.%mythicalraces_has_cooldown_class%: Class cooldown status.%mythicalraces_get_xp_class%: Current class XP.%mythicalraces_get_level_class%: Current class level.%mythicalraces_get_max_xp_class%: Class XP for next level.%mythicalraces_get_xp/max_xp_class%: Class XP progress.%mythicalraces_leaderboard_num_[position]%: Player name at leaderboard position (e.g.,_num_1).
Premium Version: Additional Commands
- /races classgui
- /races classtree [baseClassName]
- /races lvlsetclass [playerName] [level]
- /races leaderboard
- /races addxp [playerName] [amount]
- /races addxpclass [playerName] [amount]
- /races rcooldown [playerName] [time_in_seconds]
- /races sub [raceOrClassName]
- /races questview [questName]
- /races questprogress [questName]
- /races questlist
- /races reset [playerName] (Resets race/class progress)
- /races toggle
- /races toggleplayer [playerName]
Note: Premium versions typically include all free version features, plus the additional ones listed here. Always consult the specific version's documentation for the most accurate lists.
Kits Configuration
The kits system allows you to define predefined sets of items and commands that players can claim. Kits can have level requirements, cooldowns, and more.
# MythicalRaces Kits Configuration
# Kits are predefined sets of commands given to players.
# Example kit setup:
kits:
  Basic:
    displayName: '&7Basic Starter Kit'
    material: 'BOOK'
    guiPage: 1
    slot: 11
    enabled: true
    minimumLevelRequired: 0
    cooldown: 600
    commands:
      - 'minecraft:give {name} stone_sword 1'
      - 'minecraft:give {name} bread 16'
    lore:
      - '&7A basic starter kit for new players.'
      - '&7Cooldown: 10 minutes'
Key Settings for Kits:
- Permissions: Each kit requires a specific permission (e.g.,
mythicalraces.kit.Basic). cooldown: The time in seconds a player must wait before claiming the kit again.commands: A list of console commands executed when the kit is used. Placeholders like{name}can be used to target the player.
Custom Recipes (Premium Addon)
With MRPremiumAddons, you can create custom crafting recipes. These can yield vanilla items or items with powerful abilities.
# MRPremiumAddons Custom Recipe Configuration Guide
# Custom recipes can be enabled to allow players to craft custom items.
customRecipes:
  enabled: true

  recipes:
    explosiveSnowball:
      type: shapeless
      result:
        material: SNOWBALL
        amount: 1
        customModelData: 101
        name: "&cExplosive Snowball"
      ingredients:
        - SNOWBALL
        - GUNPOWDER
      abilities:
        - "PROJECTILEEVENT====SNOWBALL====summon minecraft:tnt {x} {y} {z} {Fuse:0}====100====1000"
Recipe Features:
type: Can beshapeless(ingredients in any order) orshaped(must match a pattern).result: Defines the crafted item, its name, lore, and optionalcustomModelData.abilities: Attach custom plugin abilities to the crafted item (like throwing explosive snowballs).
Quests System (Premium Feature)
The premium version of Mythical Races often includes a robust questing system, allowing you to create objectives for players to complete, tied to their race, class, or available to all.
Quests are typically defined in a separate YAML file (e.g., quests.yml). Here's a breakdown of how to configure them, using the example provided:
# This is your quest configuration file, where you define quests for your game.
# It's usually found in plugins/MythicalRaces/quests.yml (or similar path for premium versions)

# --- Event Types Explained ---
# These define how quest objectives are completed.
# - 'BLOCK-BREAK:BLOCK_TYPE:AMOUNT' - Player breaks 'AMOUNT' of 'BLOCK_TYPE'.
#     Example: 'BLOCK-BREAK:STONE:50' (Break 50 Stone blocks)
# - 'BLOCK-PLACE:BLOCK_TYPE:AMOUNT' - Player places 'AMOUNT' of 'BLOCK_TYPE'.
# - 'KILL-ENTITY:ENTITY_TYPE:AMOUNT' - Player kills 'AMOUNT' of 'ENTITY_TYPE'.
#     Example: 'KILL-ENTITY:ZOMBIE:20' (Kill 20 Zombies)
# - 'ITEM-PICKUP:ITEM_NAME:AMOUNT' - Player picks up 'AMOUNT' of 'ITEM_NAME'.
# - 'ITEM-DROP:ITEM_NAME:AMOUNT'   - Player drops 'AMOUNT' of 'ITEM_NAME'.
# - 'ITEM-CRAFT:ITEM_NAME:AMOUNT'  - Player crafts 'AMOUNT' of 'ITEM_NAME'.
# - 'TRAVEL-WORLD:WORLD_NAME:AMOUNT' - Player travels to 'WORLD_NAME' 'AMOUNT' of times.
# - 'KILL-ENTITY-PROJECTILE:ENTITY_TYPE:AMOUNT' - Kill 'ENTITY_TYPE' with a projectile 'AMOUNT' times.

# --- Placeholders for Quest Commands ---
# Use these in 'startingQuestCommands' and 'finishedQuestCommands'.
# {'x'}, {'y'}, {'z'} - Player's current X, Y, Z coordinates.
# {'player'}          - Player's name.
# {'world'}           - Name of the world the player is in.

# --- Assigning Quests ---
# 'assignedTo' can be a specific race name, class name, or 'ALL'.
# To assign to multiple, list them:
# assignedTo:
#   - 'Elf'
#   - 'Human'
# If you want to effectively disable all quests, you can edit the 'Beginning'
# quest (or any other first quest) and set 'assignedTo' to 'NONE'.

# --- SQL Database (Optional, for persistent quest progress across servers/restarts) ---
sql:
  # Set to true to store player progress using their UUID (recommended).
  use_uuids: true
  # 'local' (uses a local file, e.g., SQLite) or 'remote' (MySQL).
  connection_type: "local"

  # If connection_type is "remote", fill in your MySQL details here:
  connection_string: "jdbc:mysql://localhost:3306/your_database_name?user=your_username&password=your_password"

  # Set to true to see quest start/end command logs in the console.
  enableLogFilter: true

# --- Quest Definitions ---
quests:
  Beginning: # This is the internal name of the quest
    displayName: "&a🌱 Beginning Steps" # How the quest name appears in-game
    description: "Start your adventure by gathering basic resources."
    lore: # Text shown in the quest GUI or info command
      - "&7The first steps on a long journey."
      - "&e- Break 10 Grass Blocks"
      - "&e- Break 10 Dirt Blocks"
      - "&f-------------------------"
      - "&6Rewards:"
      - "&f- 1 Diamond"
      - "&f- 50 XP (MythicalRaces XP)"
    events: # List of objectives for this quest
      - 'BLOCK-BREAK:GRASS_BLOCK:10' # Note: Original had GRASS, ensure it's correct block name
      - 'BLOCK-BREAK:DIRT:10'
    assignedTo: # Who can take this quest
      - 'ALL'
    startingQuestCommands: # Commands run when the player starts this quest
      - 'execute at {player} run playsound minecraft:ui.toast.challenge_complete player {player} {x} {y} {z}'
      - 'tellraw {player} {"text":"Quest Started: Beginning Steps! Use /races questview Beginning","color":"yellow"}'
    finishedQuestCommands: # Commands run when the player completes ALL events for this quest
      - 'execute at {player} run playsound minecraft:entity.player.levelup player {player} {x} {y} {z}'
      - 'minecraft:give {player} diamond 1'
      - 'mr addxp {player} 50' # Example for MythicalRaces add XP command
      - 'tellraw {player} {"text":"Quest Complete: Beginning Steps! You earned a diamond and XP!","color":"green"}'
Key Parts of Quest Configuration:
- Event Types (Objectives): Define what players need to do (e.g.,
BLOCK-BREAK:STONE:50means break 50 stone blocks). The comments in the example list common event types. - Placeholders for Commands: When quests start or finish, you can run commands. These commands can use placeholders like
{player},{x},{y},{z}, and{world}. assignedTo: Specifies which races or classes can undertake the quest.ALLmeans everyone. You can list multiple race/class names. Setting toNONEfor the first quest can effectively disable the quest system if desired.sqlSection: Configures database settings for storing quest progress, useful for multi-server setups or ensuring progress persists.localoften means an SQLite file, whileremoteis for MySQL.questsSection: This is where individual quests are defined.- Internal Quest Name (e.g.,
Beginning:): The unique ID for the quest. displayName: How the quest name appears in-game (supports color codes).description: A short summary of the quest.lore: Detailed text shown in GUIs/info, often listing objectives and rewards.events: A list of the actual objectives using the Event Type format.startingQuestCommands: Commands run when a player accepts or is given the quest.finishedQuestCommands: Commands run upon successful completion of all events in the quest.
- Internal Quest Name (e.g.,
Tip: When defining quest objectives like BLOCK-BREAK:GRASS:10, ensure GRASS is the correct Material name (it might be GRASS_BLOCK for the block itself). Always verify material and entity names.